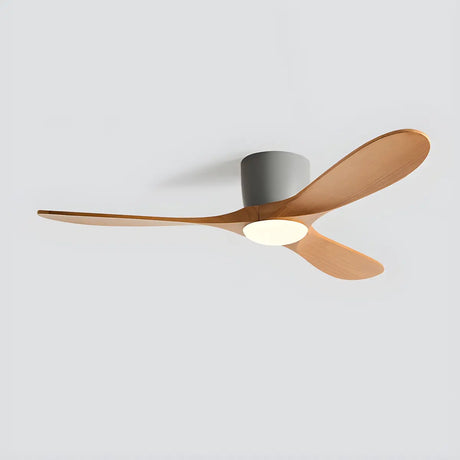
That layer of dust on your ceiling fan? It's not just sitting there. Every time you turn it on, you're blowing allergens around your home. Even worse, a clogged fan works overtime, hiking up your energy bill. The good news? A simple cleaning routine can fix all this. Here's how to do it safely and efficiently without creating a dust storm in your living room.
Table of Contents
- Essential Preparations Before Cleaning a Ceiling Fan
- Grab Your Ceiling Fan Cleaning Toolkit
- How to Clean the Ceiling Fan? Step-by-Step Methods
- Ceiling Fan Maintenance and Troubleshooting Tips
- How to Maximize the Ceiling Fan's Efficiency and Lifespan?
- When do you need professional cleaning help?
- Conclusion
- FAQ
1. Essential Preparations Before Cleaning a Ceiling Fan
Before you start cleaning, always set up a safe workspace-this protects you and helps your efforts last longer.
- Power off completely. Turn off the wall switch, then find the circuit breaker and flip that too.
- Lay down protection. Put old sheets or drop cloths under the fan to catch falling dust-saves you from cleaning everything twice.
- Get a proper ladder. Use a sturdy step ladder, never chairs or tables. Those wobble and cause falls.
- Wear a dust mask. Ceiling fans collect months of dust and allergens that go airborne when disturbed. A simple paper mask prevents irritation.
2. Grab Your Ceiling Fan Cleaning Toolkit
Having the right tools makes the difference between a frustrating chore and an efficient cleaning session.
Ceiling fan cleaning essential equipment
| Tool | Purpose | Pro Tip |
| Old pillowcases (2-3) | Blade cleaning without mess | Slightly dampen for better dust capture |
| Microfiber cloths | General wiping and polishing | Use separate cloths for wet/dry tasks |
| Step ladder | Safe access to fan | Test stability before climbing |
| Extendable ceiling fan duster | Quick maintenance between deep cleans | Choose one with bendable head |
| Soft brush | Motor housing and vents | Old toothbrush works well |
| Vacuum with attachments | Heavy dust removal | Brush and crevice tools essential |
| Compressed air | Hard-to-reach areas | Short bursts prevent damage |
Ceiling fan cleaning solutions by situation
Light dust: Plain water or dry microfiber cloth General cleaning: Equal parts white vinegar and water Heavy grime: Mild dish soap in warm water Kitchen grease: Degreasing cleaner or stronger soap solution Disinfecting: Pre-made disinfectant wipes
Important: Never spray cleaners directly on fan blades. Always apply to your cloth first.
3. How to Clean the Ceiling Fan? Step-by-Step Methods

Not sure where to start? These step-by-step methods cover everything from light dusting to deep cleaning-pick what works for your fan's current state.
Method 1: Trap dust with the pillowcase
This technique traps dust instead of spreading it around your room.
Step 1: Slide an old pillowcase over one blade, covering it completely.
Step 2: Gently wipe the blade's top, bottom, and edges through the pillowcase fabric.
Step 3: Slowly pull the pillowcase off the blade. The dust stays trapped inside.
Step 4: Repeat for each blade using the same pillowcase.
Step 5: While you're up there, use a clean section of the pillowcase to quickly wipe down light fixtures and motor housing to remove surface dust.
Step 6: Take the pillowcase outside, turn it inside-out, and shake out the dust.
Pro tip: Lightly spray your vinegar solution inside the pillowcase before use. This helps capture fine dust particles.
Method 2: Dust quickly with a duster or cloth
For weekly touch-ups, an extendable ceiling fan duster works perfectly. This specialized tool has a curved design that cleans both sides of a blade simultaneously-just slide it onto the blade and move it back and forth. Then use the same duster to clean pull chains and motor housing.

Microfiber cloths also grab fine dust well. Fold the cloth into quarters for maximum surface area and dust-holding power. After cleaning the blades, wipe down light shades with the cloth. For fabric shades, use your vacuum's brush attachment on low suction instead.
Method 3: Deep clean sticky buildup with solution
Start with dry dusting to remove loose particles, then dampen a microfiber cloth with your chosen cleaning solution. Wipe each blade thoroughly, paying attention to the leading and trailing edges where dust accumulates most. Work from the center outward to avoid dripping on the motor. Kitchen fans need special attention since cooking creates sticky buildup that attracts more dust-use a degreasing cleaner and expect to make multiple passes. For outdoor fans, inspect for spider webs, leaves, and other debris from weather exposure.

While the blades dry, tackle the other components. Remove glass light shades by unscrewing or unclipping them and wash in warm, soapy water like dishes. Wipe the motor housing with your damp cloth and clean pull chains with alcohol wipes since they get sticky from hand oils. Use a soft brush around motor vents or compressed air in short bursts-these openings let the motor breathe and blocked vents force it to work harder. Always dry all components completely with a clean cloth to prevent water spots and protect the finish. For outdoor fans using a garden hose on low pressure, avoid electrical components and dry thoroughly before reconnecting power.
4. Ceiling Fan Maintenance and Troubleshooting Tips
A regular maintenance routine prevents problems and extends your fan's operational life significantly.
How often should you clean your ceiling fan?
| Fan Location | Cleaning Frequency | Reason |
| Kitchen | Weekly | Grease and cooking particles |
| Living areas | Every 2 weeks | Standard dust accumulation |
| Bedrooms | Every 2 weeks | Fabric fibers and skin cells |
| Rarely used rooms | Monthly | Less dust, but still accumulates |
Common ceiling fan problems and solutions
Noise during operation often indicates balance or hardware problems. Check blade balance after cleaning and tighten visible screws with the appropriate screwdriver. Inspect for warped or damaged blades that might create vibration.
Wobbling or shaking typically results from loose mounting or blade alignment issues. Verify all mounting screws are tight and check if blades are properly aligned. Look for warped blades, especially near windows where humidity fluctuates and can cause wood components to bend.
Reduced airflow usually stems from blocked vents or mechanical obstructions. Clean motor vents thoroughly and check for objects blocking blade movement. Verify all blades are present and intact, as missing or damaged blades significantly reduce air circulation.
Preventive ceiling fan maintenance tips
- Check and tighten screws monthly. Fan vibration gradually loosens hardware.
- Inspect blade condition during cleaning. Look for cracks, warping, or loose attachments.
- Some older fans need motor oil-check your manual. Most modern fans have sealed motors that never need lubrication.
5. How to Maximize the Ceiling Fan's Efficiency and Lifespan?
Clean fans use less electricity and move more air. Dust on blades creates drag that forces motors to work harder. Regular maintenance prevents small problems from becoming expensive repairs. A $5 cleaning routine can prevent a $200 motor replacement.
Energy impact: A clean fan moves 10-15% more air than a dusty one while using the same electricity.
Air quality benefit: Clean fans don't circulate accumulated allergens, dust mites, and pet dander.
6. When do you need professional cleaning help?
Knowing when to fix things yourself and when to call a professional keeps you safe and protects your investment.
Warning signs requiring immediate attention
| Warning Sign | Potential Cause | Urgency Level |
| Unusual grinding or clicking noises | Bearing wear or loose components | High |
| Visible wobbling during operation | Mounting issues or blade damage | Medium |
| Noticeably reduced air movement | Motor problems or severe buildup | Medium |
| Scorch marks around motor housing | Electrical issues | Critical |
| Loose or missing blade attachments | Hardware failure | High |
Professional vs. DIY maintenance
Most ceiling fan maintenance is manageable for the average homeowner. DIY-friendly tasks include all cleaning procedures covered in this guide, basic screw tightening, simple blade replacement, and light fixture maintenance. These tasks require only basic tools and common sense safety precautions.
Professional help becomes necessary for electrical wiring issues, motor replacement or major repairs, ceiling mount problems, and complex balancing that DIY methods don't resolve. These jobs require special skills and tools, making the cost of expert service worth it.
Conclusion
Regular ceiling fan cleaning transforms a dusty, inefficient appliance into a quiet, effective home comfort tool. The pillowcase method eliminates the mess that makes this chore unpleasant, while comprehensive cleaning maintains both performance and appearance. A 20-minute cleaning every two weeks prevents problems and keeps your fan running smoothly for years.
FAQ
What is the easiest way to clean ceiling fans?
What is the easiest way to clean ceiling fans?
The pillowcase method is the simplest and least messy. Slide an old pillowcase over each blade, wipe gently, and pull it off to trap dust inside.
How to clean greasy ceiling fan blades?
How to clean greasy ceiling fan blades?
Start with dry dusting, then use a cloth dampened with warm water and dish soap. For stubborn kitchen grease, switch to a degreasing cleaner and make multiple passes.
Why does my ceiling fan get so dusty so fast?
Why does my ceiling fan get so dusty so fast?
Ceiling fans stir air constantly, which pulls in dust, pet dander, and allergens. Static on the blades also attracts fine particles, especially in dry indoor climates.


![10 Best Floor Lamp for Reading [2025 Review]](http://www.homebaa.com/cdn/shop/articles/banner_c990b0a4-4743-4902-b6be-5609f7a21a90.webp?v=1747357941)







![How to Choose the Coffee Table Height? [2025 Newest Guide]](http://www.homebaa.com/cdn/shop/articles/coffee-table-height.webp?v=1749523259)


